Hammock Mosquito Net - DIY
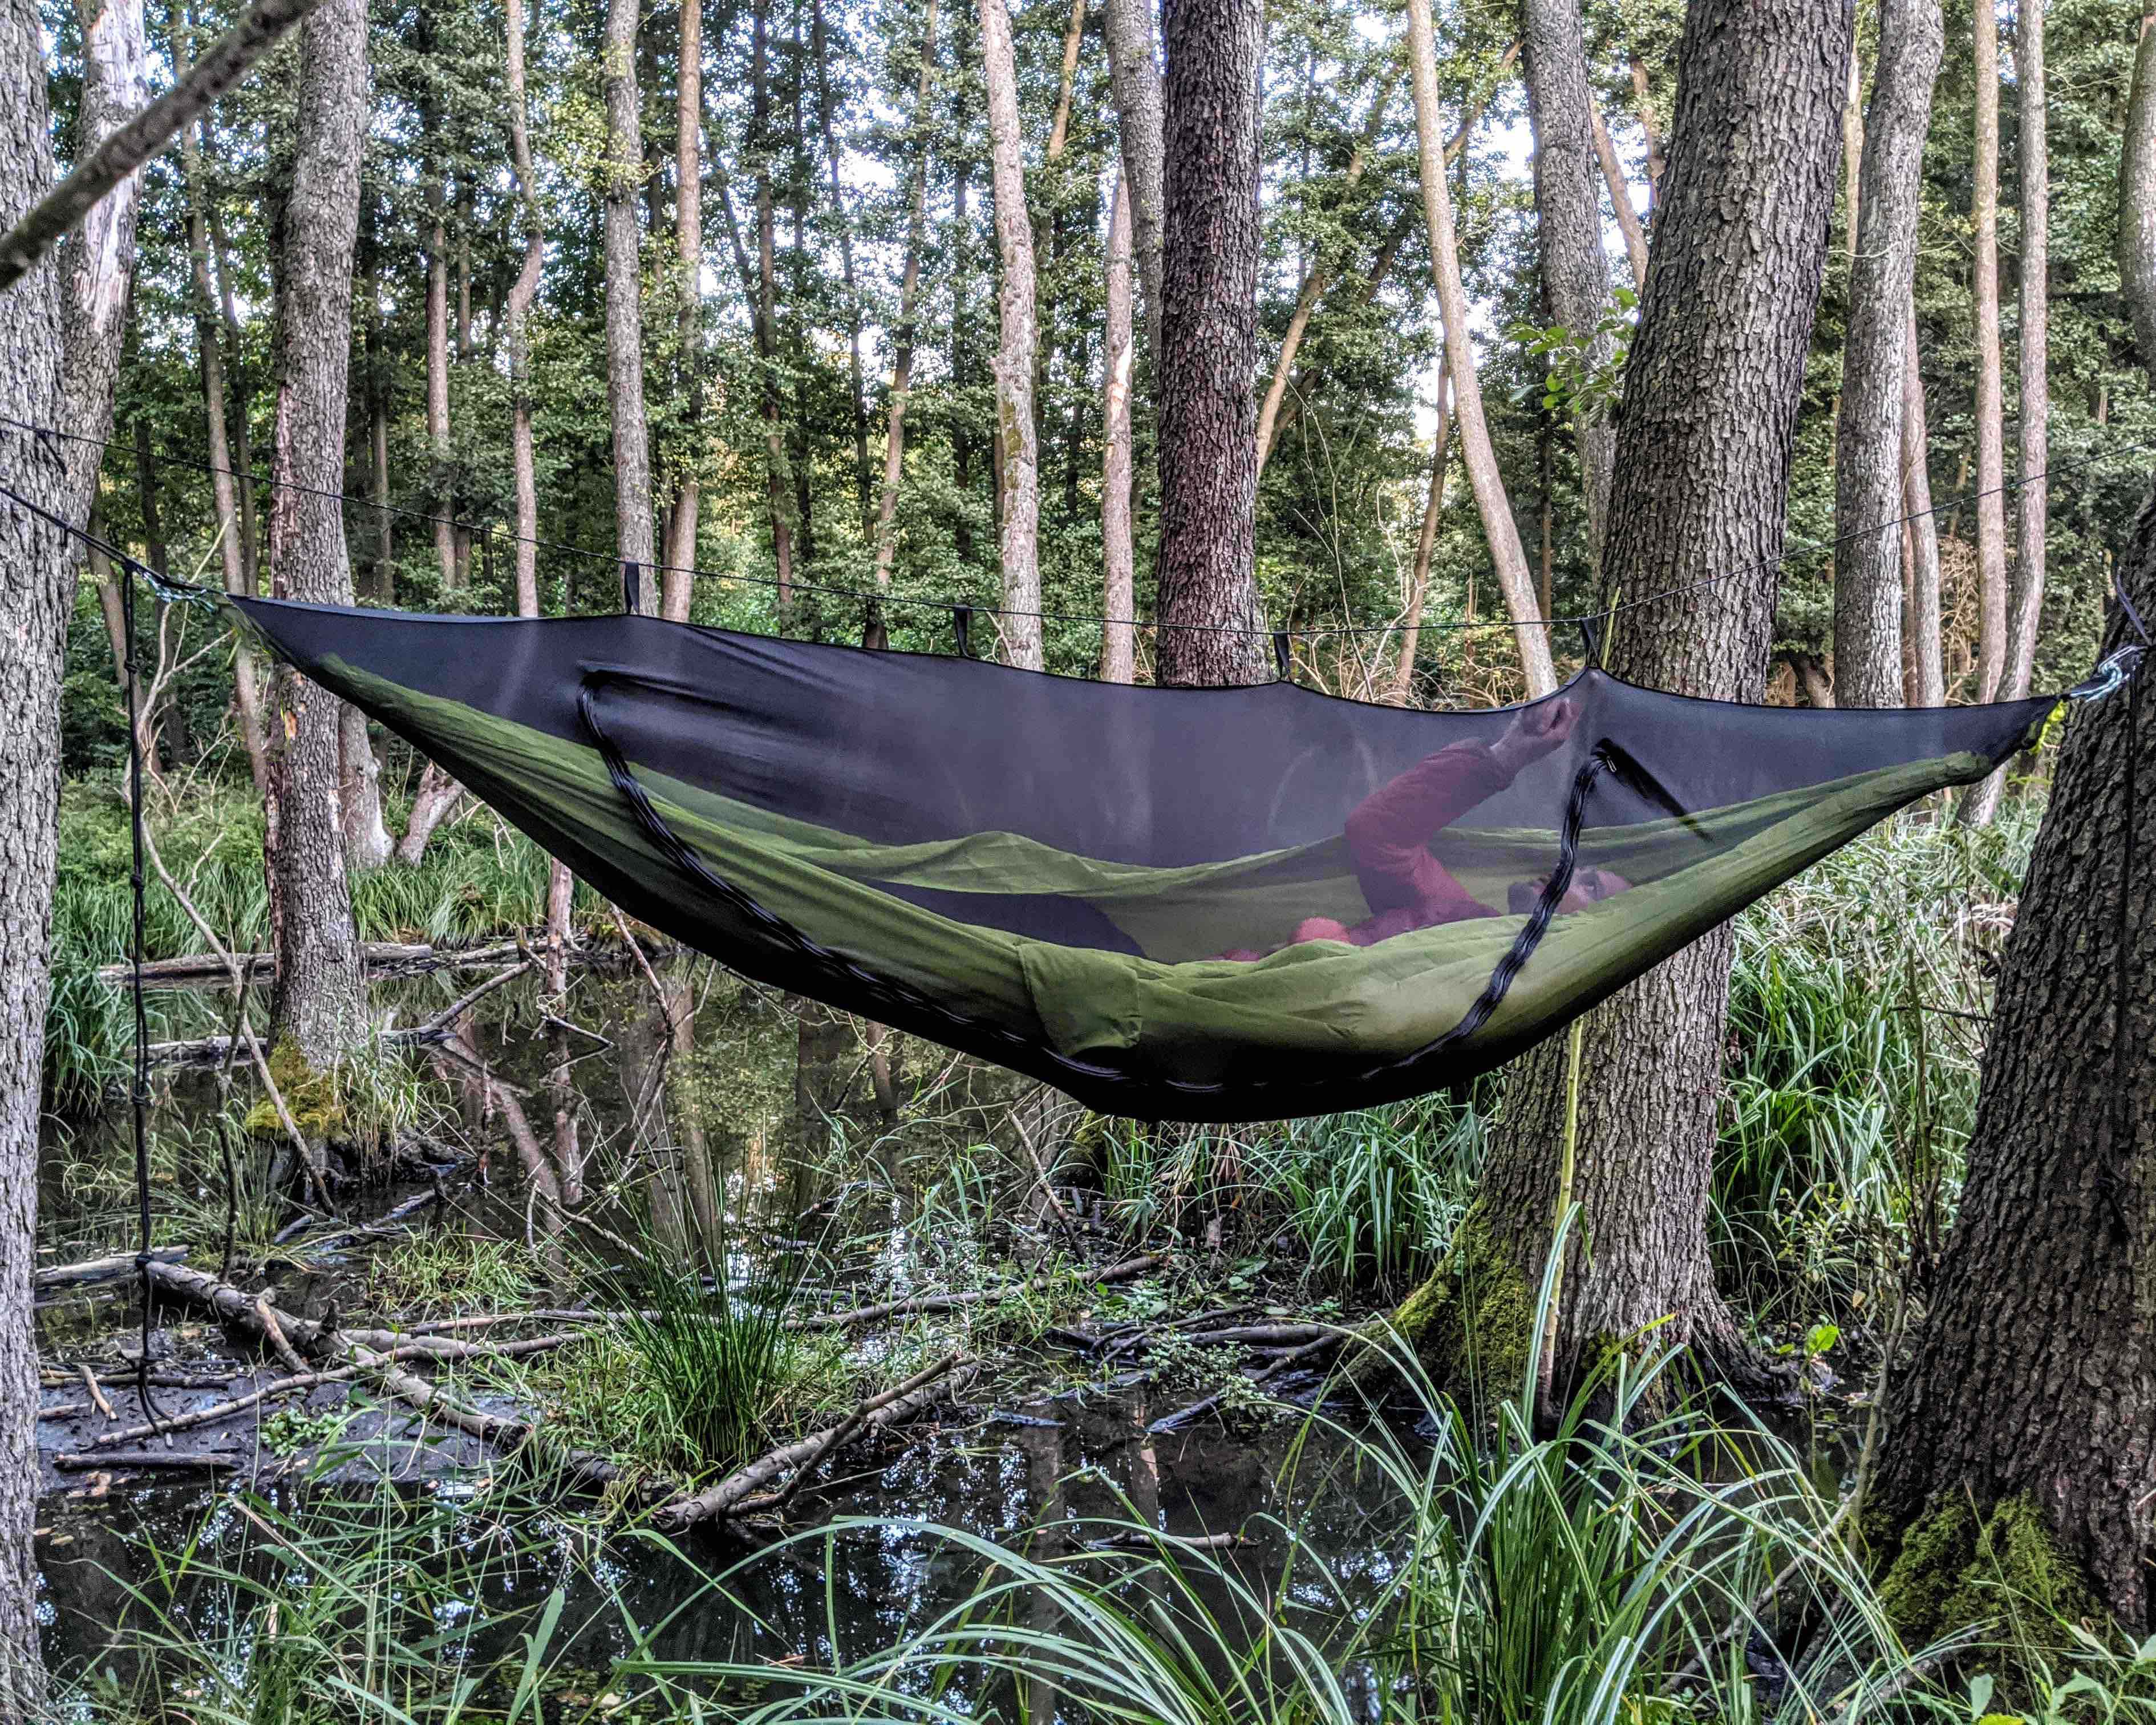
A hammock mosquito net is a piece of gear that we appreciate most during the summer season. Mosquitoes and small flies can be annoying and ruin our hammock experience, which is why it’s worth having this equipment. In our article, we aim to show that making an ultra-light mosquito net yourself doesn’t have to be difficult or expensive.
Required Materials:
- 6 m nylon mesh
- 3 mm zipper – 2.5 m
- 15 mm webbing – 3.3 m
- Two YKK sliders – 3 mm
- 5 half-rings – for cord attachments
- 4 stoppers
- 1 m elastic cord – for making drawstrings at the ends of the mosquito net
- Black titanium thread
Step 1 – Cutting the shape of the mosquito net
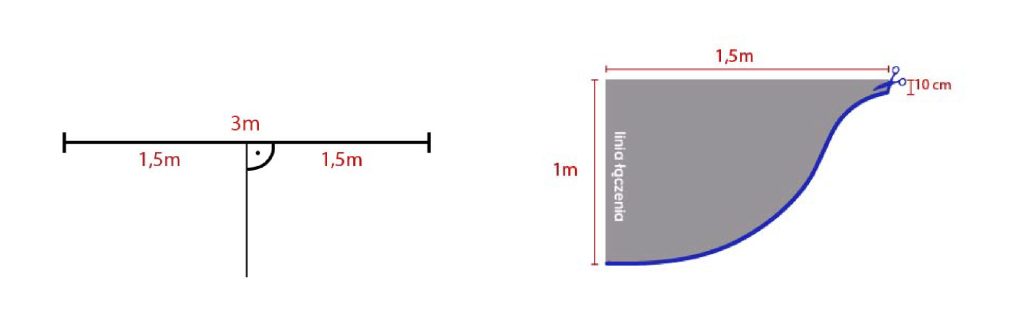
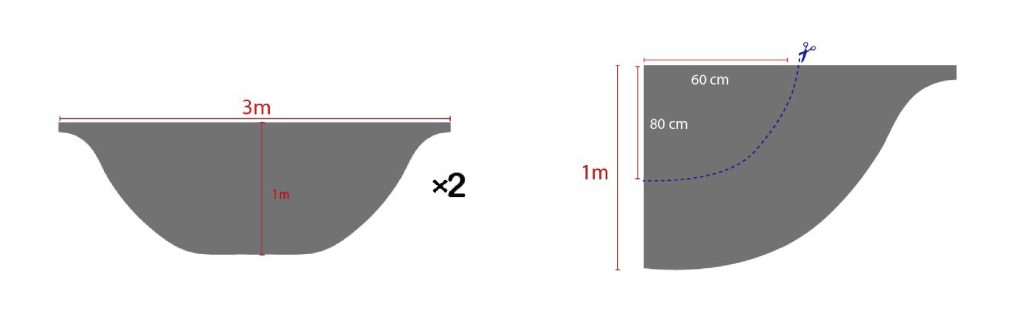
Before moving on, make sure you have two pieces shaped like this: diagrams 1, 2, and 3.
Step 2 – Inserting the zipper
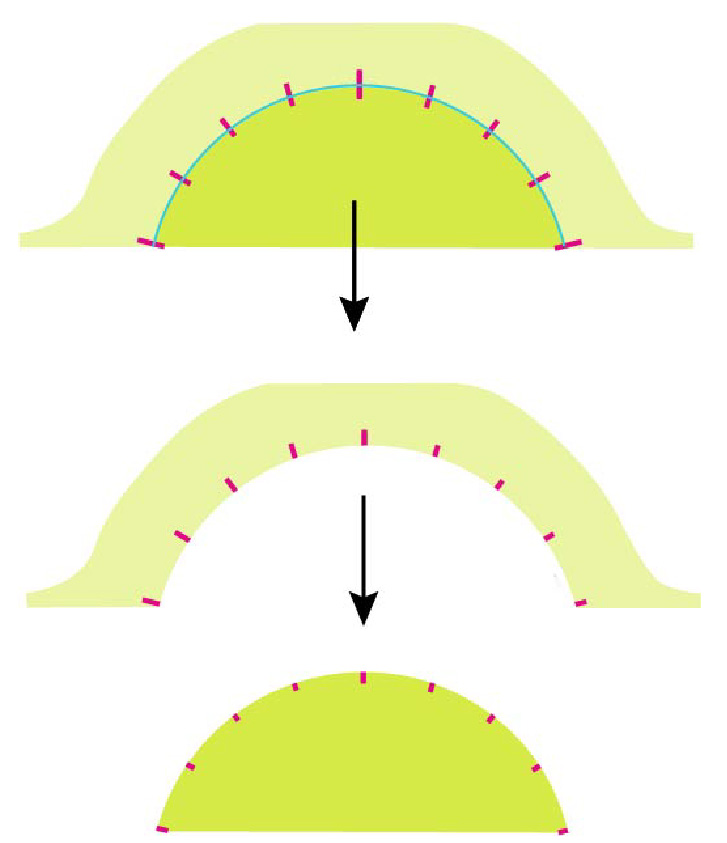
One of the pieces is folded in half according to the illustration below. Measure 80 cm from the top along the fold and 60 cm from the side along the fold. Using tailor’s chalk, draw a curve connecting the two extreme points and cut along the line. This is where the zipper will go. Figures 3 and 4.
Step 1 – Fig. 1
Step 1 – Fig. 2
Step 1 – Fig. 3
Step 2 – Fig. 4
Tips for beginner zipper sewers:
- Sew in a closed zipper with the slider already attached.
- On the drawn zipper curve, mark “meeting points” every 30 cm or more frequently. Because of the zipper’s width, the curves on both sides will differ slightly in length (like lanes on a running track), so it is important that the fabrics of both pieces “meet” at the same point at the zipper.
- When inserting the zipper, the intersection point should align on both the left and right sides.
- First, attach the zipper to the upper (longer) curve, then to the second (shorter) curve, paying attention to the meeting points. It’s easier to stretch the mosquito net to the correct meeting points than to adjust the longer curve/fabric.
Step 3 – Sewing on the connecting tape
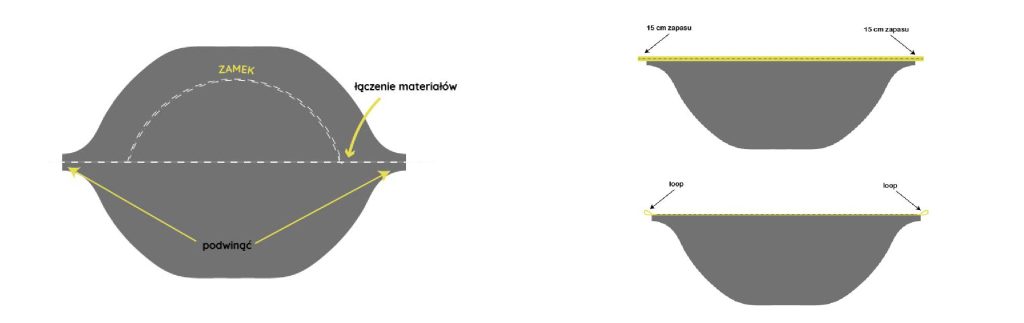
We join both pieces together with a straight stitch. Place the tape over the seam so that 15 cm of extra tape extends on each side. Sew it in place with two straight stitches at the ends of the tape. Fold the protruding parts of the tape to create loops and sew them as well with a straight stitch, folding in the ends of the tape.
Step 4 – Sewing the semicircles as needed
https://www.ripstop.pl/en/sklep/diy-set/mosquito-net-diy-set/
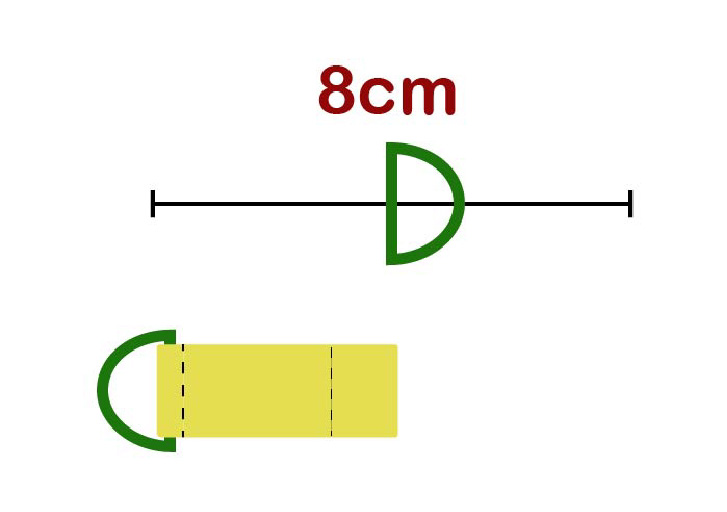
Sew the semicircles onto the tape of the mosquito net, folding the ends outward if you want to additionally attach the net to a cord between trees. Fold them inward if you want to later hang a lamp or your phone.
Step 5 – Sewing the bottom part of the mosquito net
Done! Now you can sleep peacefully 😉